Quilted Tote with Pockets
- Madison Tyndall
- Feb 21
- 4 min read

I've actually been wanting to make a tote like this for a while - something I can carry over my shoulder that is sturdy and has pockets! I'm so happy I got the chance to make one this week. I love how customizable sewing projects, including bags, are. You can really choose any fabric or combination of colors you want and just have fun with creating the project!

Materials:
About 1 yard fabric for outside of tote bag
About 1 yard fabric for inner lining of tote bag
About 1 yard of batting (you can also stitch smaller pieces of batting together)
Clothes iron
Basic sewing supplies (machine or needle, thread, scissors, etc.)
Instructions:
There is a 5/8 inch seam allowance for all parts of this tote bag, unless stated otherwise.
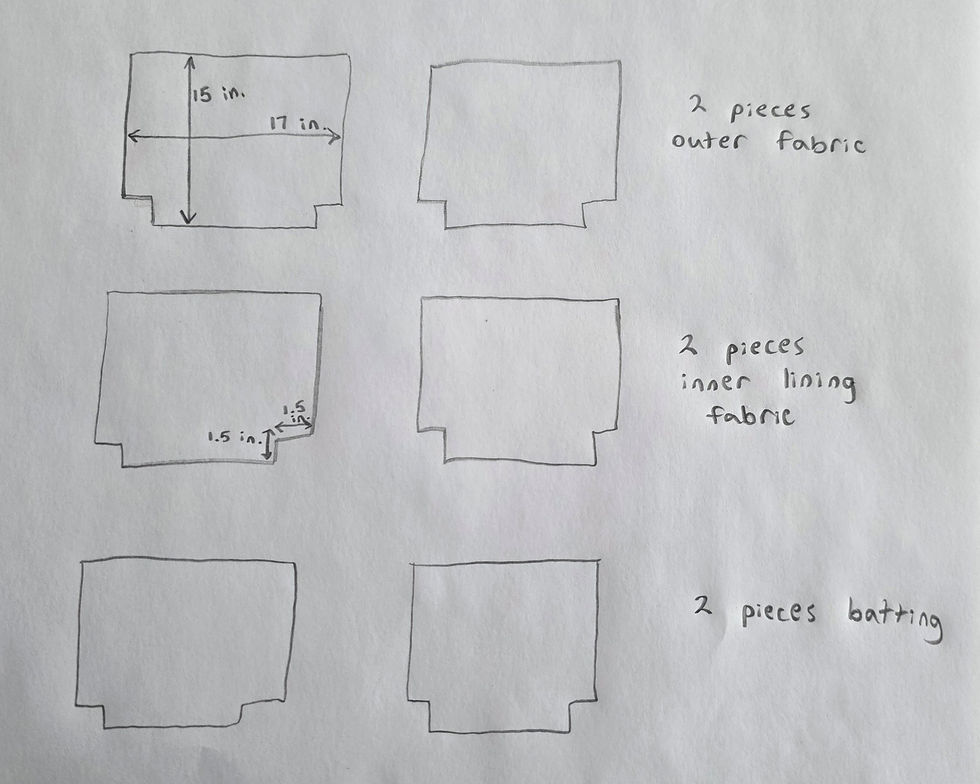
Cut your fabric and batting:
Cut out two pieces of your outside fabric and two pieces of inner lining fabric - 17 inches wide by 15 inches tall. Cut out 1.5 inch squares from bottom two corners of each piece.
Cut out two pieces of batting, also 17 inches wide by 15 inches tall. Cut out 1.5 inch squares from bottom two corners.
Cut out two pieces of the fabric you intend to use for the straps of the tote. Cut to 24 inches long by 4.5 inches wide.
Cut out two pieces of batting for the straps, also 24 inches long by 4.5 inches wide.
Cut out two pieces of the fabric you intend to use for the tote pockets. Cut to 7 inches wide by 8 inches tall.

Piecing together and sewing the tote:
Place a piece of outer fabric against a piece of batting, making sure that the fabric has the right side facing outward. Quilt the two layers together by stitching lines or patterns across. I just did simple vertical lines, but you could use any pattern for this part.
Repeat with other outer piece of fabric and batting.
Take a pocket fabric piece and iron down the edges, turning them over twice so the raw ends are hidden. Sew the edges down. (This seems self-explanatory, but MAKE SURE your edges are tucked towards the wrong side of the fabric so they won't show when you sew the pocket on)
Pin your pocket (right side facing out) to the outside of one of your quilted outer pieces. Make sure it is centered and about 4 inches down from the top.
Sew the pocket on, leaving the top open for later use.
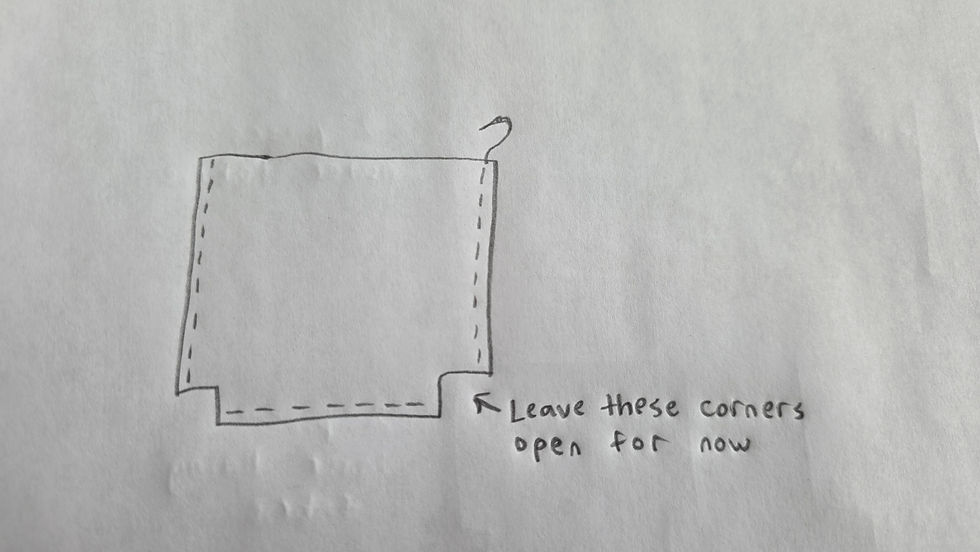
Place quilted outside pieces against each other (batting sides facing out) and pin. Sew the sides and bottom together (DO NOT sew the two 1.5 inch corner cutouts yet! Those are for the boxed corners later).
Take your second (and final) pocket fabric piece and iron down the edges, turning them over twice so the raw ends are hidden. Sew the edges down.
Pin your pocket (right side facing out) to the outside of one of your inner lining pieces. Make sure it is centered and about 4 inches down from the top.
Sew the pocket on, leaving the top open for later use.
Place inner lining pieces against each other (wrong sides facing out) and pin. Sew the sides and bottom together, the same as before EXCEPT this time you will need to leave a gap at the bottom (about 4 inches or more). This gap will be used to flip the bag at the end.

Use the iron to press all seams open. This will help the bag lay better once it's sewn together.
To prepare the boxed corners, take your quilted piece of batting/fabric that you sewed together. Look at the 1.5 inch corner cutout holes and pull slightly to open. Match the side and bottom seams together and pin the corner flat in place (should be perpendicular to the previous lines you sewed). Sew straight across to complete the corner. Do the same for the other corner.

Follow the same instructions to complete the boxed corners for the inner lining. Make sure the wrong side of the fabric is facing outward when you sew these.
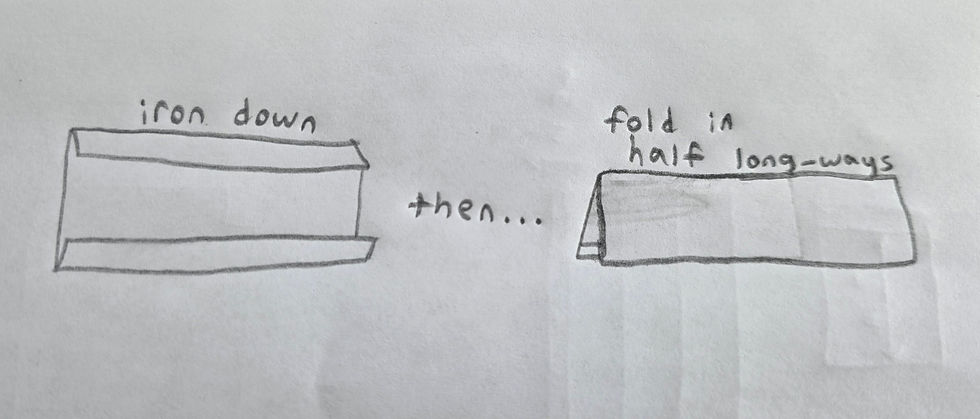
Place a piece of strap fabric against a piece of batting. Make sure the wrong side of the fabric is against the batting.
Fold the fabric lengthwise (about 1/2 inch on each side), ironing down both edges. Fold the fabric in half lengthwise and iron down. Using a 1/4 inch seam allowance, sew strap on both sides (long ways) to secure.
Repeat these instructions for the second strap.
Place inner lining of bag (right side out) inside the quilted part of bag (wrong side out). Place straps between outer and inner layer of bag on each side. Strap ends should be pinned about 3 inches from either side seam.
Pin inner lining and quilted layers together and make sure the strap ends are secure.
Sew around the top, connecting all the layers together.
Pull the tote right side out using the hole you left in the bottom of your lining fabric.
Sew up the hole at the bottom of the lining. Push the lining back into the tote bag.
Sew a final line around the top of the bag to add some stability and to hold all the layers in place.


Comments